
Week 1 of my Thanksgiving series is here y’all and this week I’m talkin’ “turkey,” tackling the gravy of your (vegan) Thanksgiving dreams, and fancying up some mashed potatoes! Remember, if you make any or all of the recipes in this series for your Thanksgiving gathering, use #aCITSIthanksgiving if you post a pic on social media! Now, let’s get started with the “turkey!”
When it comes to the “turkey” on my Thanksgiving table, I trust other folks to make it for me! Yup, that’s right, I do not make my own vegan “turkey” substitute! Instead I go with Gardein’s Turk’y Cutlets! These things are flavorful, crunchy on the outside, have a really great “meaty” texture, and yes, they taste just like the real thing. I suggest you account for 1-2 cutlets per person at your Thanksgiving table. Most people will likely only eat 1, because their plates are going to be filled with lots of other yummy stuff too, but people with bigger appetites or those who eat less sides might want 2. The cutlets come 4 to a bag and I pay about $4 a bag at my local WF.

So Gardein recommends that you bake the cutlets and I do too if you need to make more than 2 or 3 bags worth but, if you’re only making a couple bags, I suggest you fry them! Shallow frying them in a large skillet will give them even more crispy crunch and flavor, and it just takes about 3-5 minutes per side over medium heat to prepare them this way.

When they come out of the pan I like to let them rest on a paper towel for a minute or two to let any excess oil drain off and then they’re ready to enjoy. But wait, you say, what about the gravy that come with the cutlets?? Well, you could use those 2 little packets but there really isn’t much in them. A better idea is to toss that pittance of gravy back into your freezer for use another time and make your own from scratch! Why, here’s a mighty fine looking scratch-made gravy right here…

To make your own gravy from scratch, you must first make a roux. (Remember, all a roux is, is “butter” and flour cooked together!) Once the roux is starting to look a little foamy, you’ll then add in some low sodium vegetable stock, give everything a good whisking, and then bring the mixture to a boil. Once boiling, boil for 3 minutes to thicken, whisking occasionally. After 3 minutes you can turn off the heat and add in all of the flavorful goodness that makes this gravy so delicious.

Now, here are all the details (in legit printable recipe form) for the gravy but be sure to continue scrolling after this because I’m going to delve into the mashed potatoes in a moment!
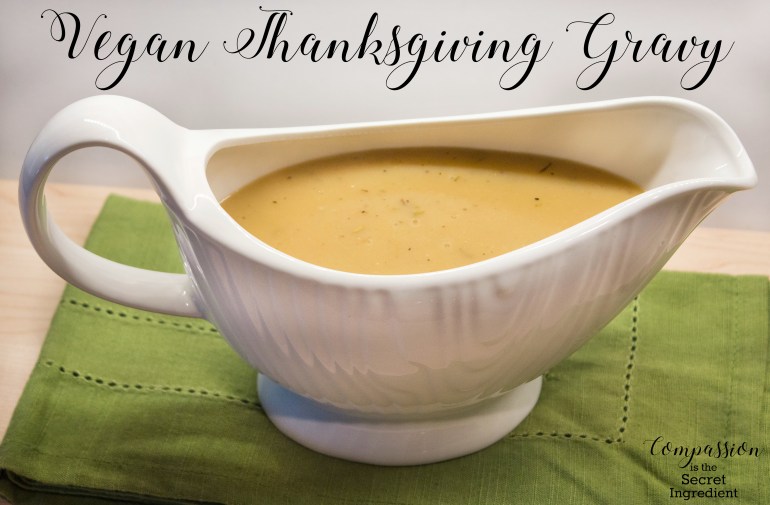
Vegan Thanksgiving Gravy
Ingredients
- 4 tablespoons vegan “butter”
- 4 tablespoons all-purpose flour
- 3 cups low sodium vegetable stock
- 2 teaspoons low sodium tamari
- 1 generous teaspoon dried thyme, crushed well in palm of hand
- 1/2 teaspoon salt
- 1/2 teaspoon black pepper
- 1/2 teaspoon onion powder
- 1/4 teaspoon garlic powder
Directions
- In a saucepan over medium heat, melt “butter.” When melted, add in the flour and whisk to combine. When the mixture becomes slightly foamy, add in the vegetable stock and increase heat to bring the mixture to a boil. Boil for 3 minutes to thicken, whisking occasionally.
- After 3 minutes, turn off the heat and add in the remaining ingredients. Whisk or stir until everything is well combined. If serving right away, carefully transfer to serving container or gravy boat. If not serving right away, leave in pan for up to 1 hour, covered, and before serving reheat for 1 minute over medium-high heat, while whisking, to bring back to temperature and to remove any skin that may have formed at the top while the gravy was sitting. Leftover gravy can be kept in an airtight container in fridge for up to 4 days.
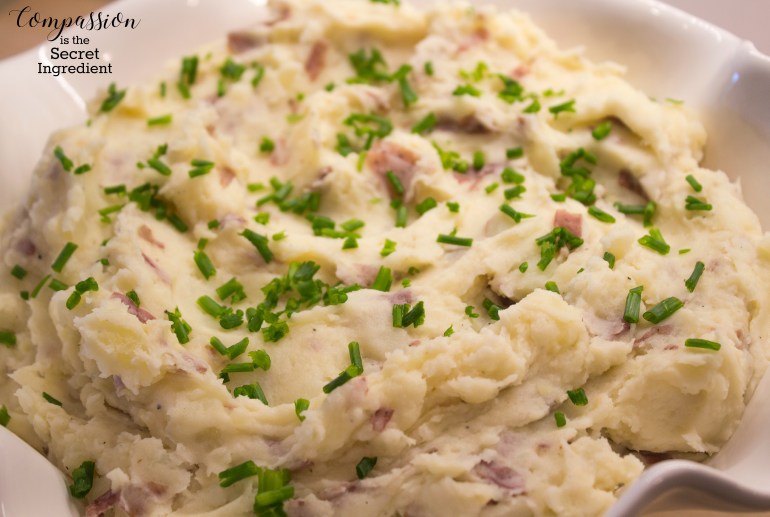
So we have the “turkey,” and we have the gravy, now we need some mashed potatoes! These mashed potatoes are so good that you can enjoy them without gravy if you wish. What makes them that good? A magical little thing called roasted garlic! It sounds super hard to make but it’s actually quite easy.
To make roasted garlic you’ll need a big ol’ whole head of garlic and some olive oil. Cut about a quarter to a half of an inch off the top of the garlic head, discard that little hat piece, then peel off some of the looser outer layers from the remaining chunk. Place the garlic head on a sheet of aluminum foil and then drizzle it with about a tablespoon or two of olive oil. Bring the edges of the foil up and squish them all together to create a completely closed foil packet around the head of garlic. Pop this onto a small sheet pan and then bake it in a preheated 400 degree oven for 45 minutes. When the timer is up, remove your roasted garlic from the oven and let it rest for about 15-25 minutes so that it’s cool enough for you to handle. When it’s cool, unwrap the foil and retrieve the garlic cloves from the head using the point of a small sharp knife. Set the cloves aside for a moment while we get the potatoes started.

To get the potatoes for our mashed potatoes going, we need to do some prep! Wash 2 1/2 pounds of red potatoes then, using a knife or potato peeler, remove the ugly bits, if any. We want as much of the skins on as can remain on so try to remove only what is absolutely necessary. Next, cut each potato down into about 1 1/2″ square pieces and toss those pieces into a large pot filled about halfway with some water. Pop the pot onto your stove and boil the potatoes for about 20 minutes or until they are fork tender.

When the potatoes are done, drain them then dump them into the bowl of your stand mixer. (If you don’t have a stand mixer you can use a large bowl and your hand mixer or a potato masher instead.) Add in the roasted garlic cloves you made earlier, some vegan “butter,” “sour cream,” salt, and pepper, then mix until smooth.

To serve, I like to garnish the top of the potatoes with some fresh chives.

Vegan Roasted Garlic Mashed Potatoes
Ingredients
- 1 large head of garlic, whole
- 1-2 tablespoons olive oil
- 2 1/2 pounds red potatoes, washed but not peeled (it’s okay to remove any ugly bits with small knife or potato peeler)
- 1/2 a stick of vegan “butter”
- 1/4-1/3 cup vegan “sour cream”
- Salt and pepper to taste
- Fresh chives, finely chopped (optional)
Directions
- Preheat oven to 400 degrees. Cut off a quarter to a half of an inch at the top of the garlic head, exposing most of the cloves inside, discarding the cut off piece. Peel off some of the looser outer layers then place the garlic head on a sheet of aluminum foil and drizzle it with about a tablespoon or two of olive oil. Bring the edges of the foil up and squish them all together to create a completely closed foil packet around the head of garlic. Pop this onto a small sheet pan and then bake it for 45 minutes. When the timer is up, remove your roasted garlic from the oven and let it rest for about 15-25 minutes so that it’s cool enough for you to handle. When it’s cool enough to handle, unwrap the foil and retrieve all of the garlic cloves from the head using the point of a small sharp knife. Set the cloves aside for a moment while we get the potatoes started.
- Cut each potato down into about 1 1/2″ square pieces and toss those pieces into a large pot filled about halfway with some water. Pop the pot onto your stove and boil the potatoes for about 20 minutes or until they are fork tender. Drain the potatoes when done.
- In a stand mixer (or a large bowl with your hand mixer or potato masher), combine the potatoes with the roasted garlic cloves, “butter,” “sour cream,” and salt and pepper to taste. Mix just until smooth then serve topped with fresh chives (optional). Leftover potatoes will keep in an airtight container in fridge for up to a week.
Well, y’all, that wraps up week 1 in my Thanksgiving series! Come back next week when I take on sweet potatoes!

